Thursday, November 1, 2018

Binding (one-way/two-way data binding)

Binding (Part-1)


(one-way data binding,two-way data binding ,pipes, NgFor )

One-way binding

In one-way data binding, the template expression {{}} and square braces [] are used to bind a property  
to the DOM .


Different types of one-way data binding.

  • Interpolation Binding
  • Property Binding
  • Attribute Binding
  • Class Binding
  • Style Binding

Interpolation Binding

With interpolation, we place the component property name in the View template, enclosed in double curly braces: {{property Name}}. 
Ex:
Open your Angular-five project .
copy and paste below code phase in home.component.ts;

 @Component({
      selector: 'app-home',
      templateUrl: './home.component.html',
      styleUrls: ['./home.component.css']
    })
    export class HomeComponent implements OnInit {

    firstname="nimal";
    lastname="perera"
      constructor() { }

      ngOnInit() {
      }

    }

copy and paste below code phase in  home.component.html

     firstname: {{firstname}}
     lastname: {{lastname}}
     fullname: {{firstname}} {{lastname}}


Property Binding


It is used to bind values of component/model properties to the HTML element. Depending on the values, it will change the existing behavior of the HTML element.
We bind  property as [property]='expression';
write phase in home.component.ts 

    public myid="input_1";

add html template to home.component.html in below,


Now run your project and Open inspect element. (right click on browser à scroll and click inspects à go through elements)

input_1 assigned to myid easily.If you want to change the name of the id u can do it changing home.component.ts myid.

Ex:  myid=”name”;
       myid=”age” .


Like that we can use property bind for add property our projects.

Ex:
01. Think you want to disable  input field .To that action using property binding.
   [disabled]="isDisabled" , used in input html field.
we can give true and false to isDisabled to disable or enable input field in our browser. 
 public isDisabled="true/false".

02. Use hidden DOM property.
 [hidden]="true/false".


IMPORTANT
Attributes and Properties are different.
Attributes --> HTML
Properties --> Document Object Model in angular
Property values however can change.


Attribute Binding


This is same  as Property Binding.Different is we have to add  "attr." with prefix attribute name
[attr.prefix attribute name]

Lets take a example.
Now we use colspan attribute of element for understand  how work attribute binding.
We can do attribute binding in three ways.

01.Using bracket [].
td [attr.colspan]="clspn"    //mostly used this way to bind attributes.

02. Using bind- keyword        
td bind-attr.colspan="clspn"

03. Using interpolation          //What is interpolation  go title InterPolation
td attr.colspan={{clspn}}

Lets open your home.component.ts and home.component.html
do as below


more details
https://angular.io/guide/template-syntax

Thursday, October 4, 2018

Angular With Bootstrap

Angular with Bootstrap


Install Bootstrap  

01.using command line (using Ng-Bootstrap) 

In this post we going to add bootstrap for our angular project . Let’s do step by step….

Step 1.
Open your project in visual studio code and open terminal. ( either open cmd and go project directory).
(if you haven't project create a project using Angular CLI)

Step 2.
 Ng-Bootstrap is available as a NPM package, so the installation can be done by using the following command in the project directory:

npm install --save @ng-bootstrap/ng-bootstrap

ex: c:\Users\..\[your project name]> npm install –save @ng-bootstrap/ngbootstrap .

Step 3.
Go to app.module.ts and import NgbModule from the package @ng-bootstrap/ng-bootstrap.

import {NgbModule} from '@ng-bootstrap/ng-bootstrap';.

Step 4.
Imports array of the @Ngmodule decorator.

@NgModule({
declarations: [AppComponent, ...],
imports: [NgbModule, ...],
bootstrap: [AppComponent]
})
export class AppModule {
}

Step 5.
Let’s go bootstrap site , use html template what do you want,
click link

02.using Bootstrap from CDN (Content Delivery Network)


Step 1.
go to bootstrap site.

Step 2.
Copy css stylesheet link and open index.html file in your project.
Paste the stylesheet link into before all other stylesheets.

Step 3.
Copy js script file and paste end of pages, before
.
Step 4.
Now you can use bootstrap component in your angular project.


Open home.component.html in your angular-five project.
Paste below code phase.
Open home.component.ts and set variable name =”Bootstrap works !.”.
Run project.


Monday, October 1, 2018

Work with Angular

Create a Component

To create component,
1. first  create folder as component.(This is optional . using folder we can make clean & clear
   project ).
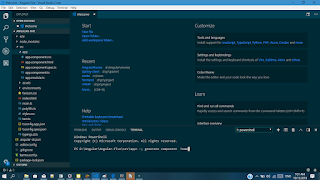
2.open terminal.
3.run command ng generate component [component name] .( short form => ng g c [component name]).


4.Now open home u can see
  •  home.component.css 
  •  home.component.html 
  •  home.component.spec.cs
  •  home.component.ts     
5. Open home.component.ts and get word phase in selector

  @Component({
  selector: 'app-home',
  templateUrl: './home.component.html',
  styleUrls: ['./home.component.css']
})
export class HomeComponent implements OnInit {

  constructor() { }
  ngOnInit() {
  }

}

6. Add selector to app.component.html
    
7. Rerun project  and see in your browser . you can see
       home work!


Friday, September 28, 2018

build first angular application

Image result for build angular 5 application      

  Generating an                                                            Angular 5 Application


Angular 5 applications are faster, lighter, and easy to use. They have material design capabilities to build beautiful and intuitive UIs . 
To get started with Angular CLI, it is required to have Node installed so that we can use the NPM tool. Executing following NPM commands generate an Angular 5 application named  'Angular-five'. 

Create a new project


open a terminal window.
Generate a new project and default app by running the following command.

ng new Angular-five


The Angular CLI installs the necessary npm packages, creates the project files, and populates the project with a simple default app.


Serve the application


Go to the project directory and launch the server.

cd Angular-five
ng serve -o


The ng serve command launches the server. 
Using the --open (or just -o) option will automatically open your browser on 


Edit your Angular-five application 

Lets change the title property from 'app' to 'My first Angular app!'. 
First open angular component . First angular component created for you . It is named app-root and it is root component , it is in ./src/app/app.component.ts 

Open the file and  change title as below, 

export class AppComponent { 

 title = "My first Angular app!"; 

 } 

So when changed browser reload automatically with new title. After reload its show ‘Welcome to My first Angular app !’ top of the angular image icon. 


              Welcome to My first Angular app !